
Managing social media accounts can be challenging, especially if you are doing it for a brand or franchise with multiple location pages. It means you have to work with people that are not geographically in the same area.
To improve the collaboration of your team is important to use a social media planning and collaboration tool to enable working more efficiently as a team.
Three essential features for better social media team collaboration
- Shared Calendar – to allow members from different locations and departments to share a view of what is being posted and scheduled on each page and platform.
- Approval workflow – providing
permissionlevels for users to enable them to create, edit and approve upcoming content across all of your social media accounts. - Templates – to inspire and guide content updates when a member of the team requires inspiration or is unsure of how to post information on a specific location page.
Having a platform to facilitate the work of a team is crucial to guarantee that multiple pages deliver their message with a consistent tone, strategy and imagery of your brand.
A social media management platform like Esemdee will provide the automation your team requires to deliver the best results and achieve efficiency across a number of channels. It will save time and increase productivity allowing you to focus more on the marketing strategies for your brand.
See on the video below how template feature works on Esemdee:
How to use templates in Esemdee
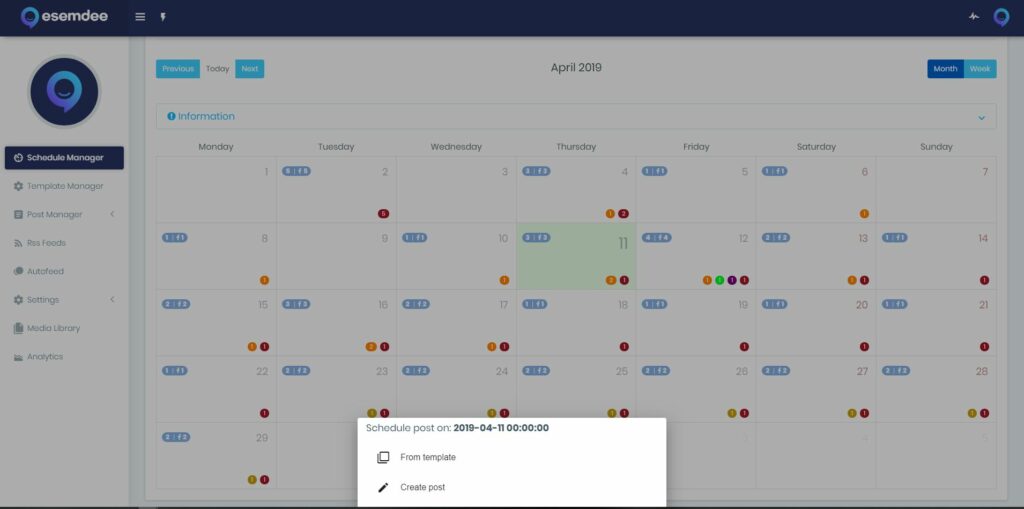
1. Go to “Schedule Manager” to create a new post from a template. This option becomes available when you click on the day you would like to post. Choose “From template”.
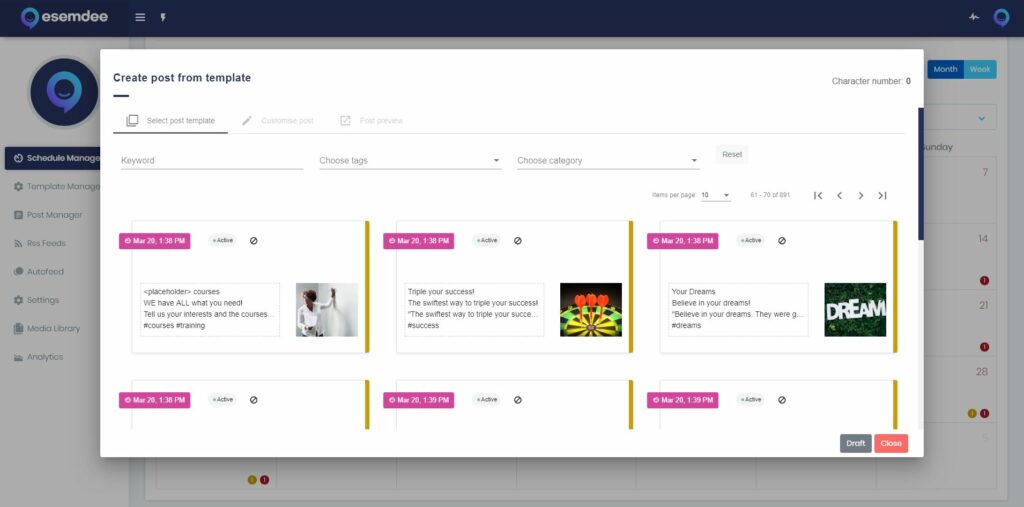
2. To find a specific template, use the filter options and select the template that best suits your needs.
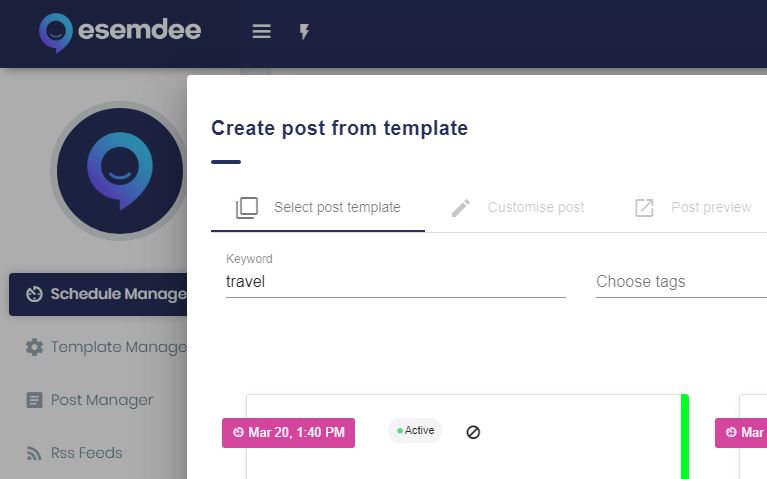
3. For example, if you want to use a template related to travel, type “travel” in the keyword field.
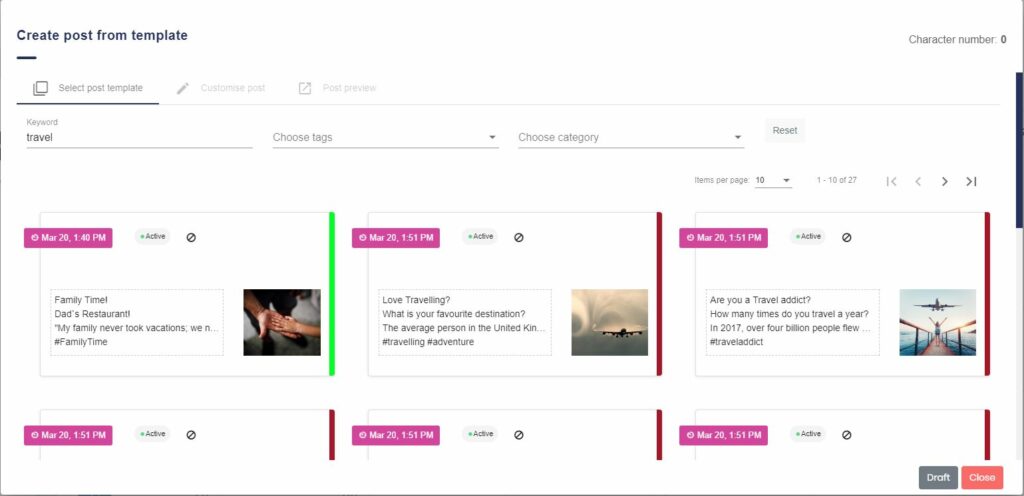
4. A list of post templates related to travel will appear and you can also see the date they have been created. It only shows the templates which are active and ready to be used for a post. Select one of the templates.
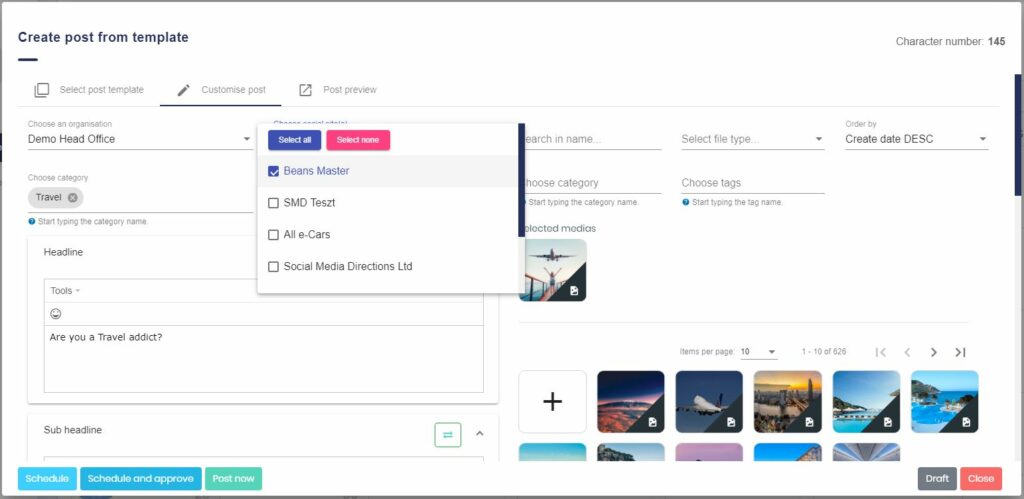
5. Select the social networks where you would like to publish the new post.
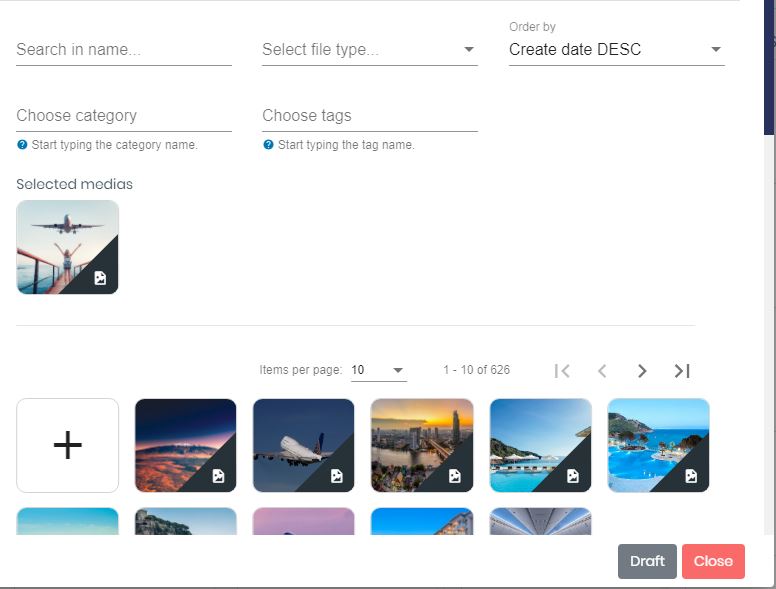
6. Change the image if you want or add more images to your post from your media library.
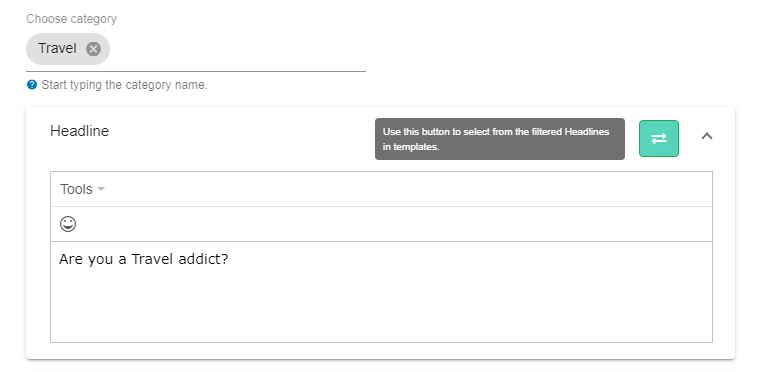
7. Write a new headline or click the green arrows to see a list of other available travel related headlines.
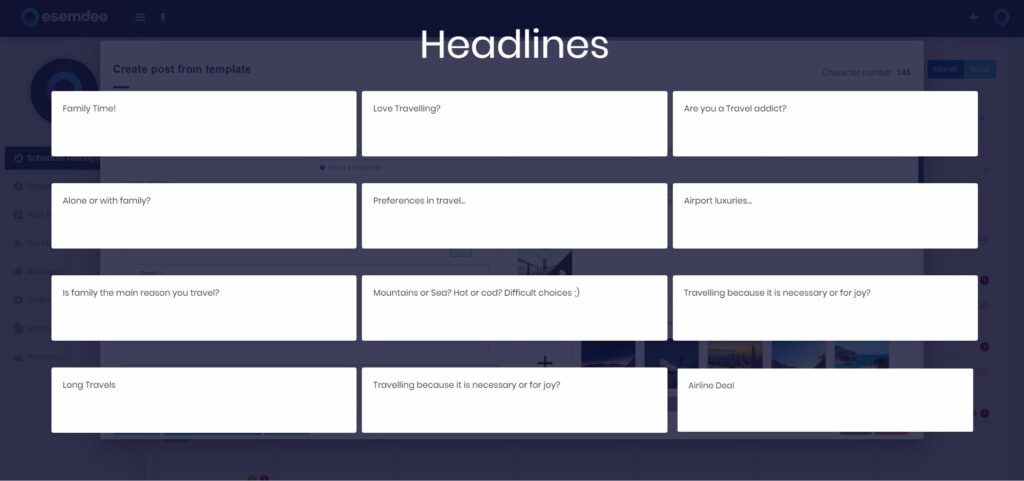
8. Choose another headline to add to your post.
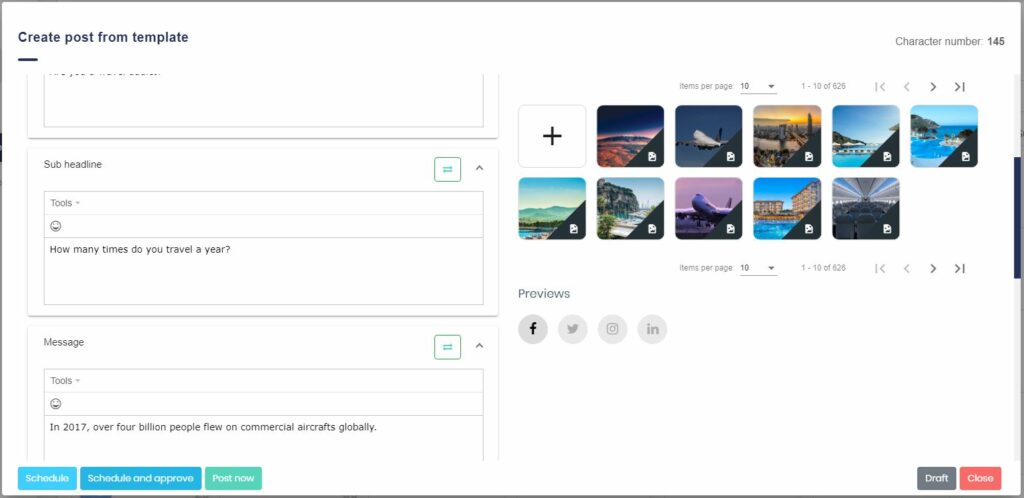
9. You can also choose related sub-headlines and messages.
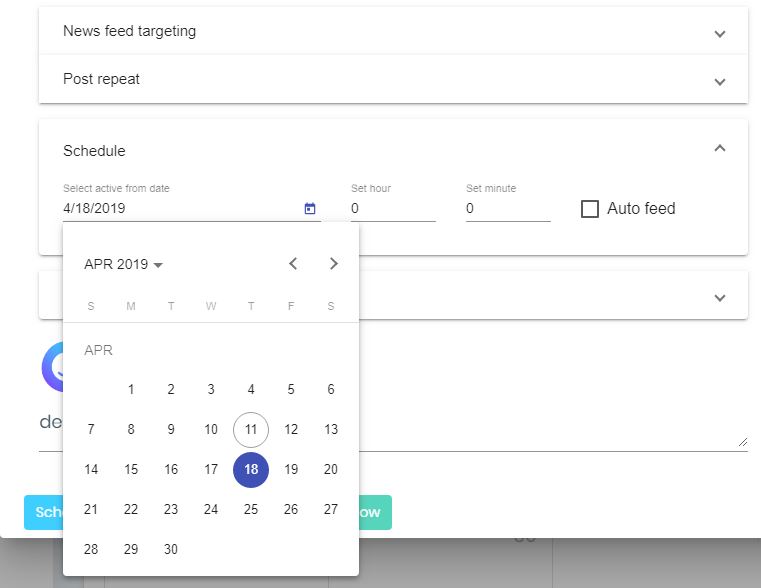
10. Confirm the date the new content will be published to your chosen social media page.
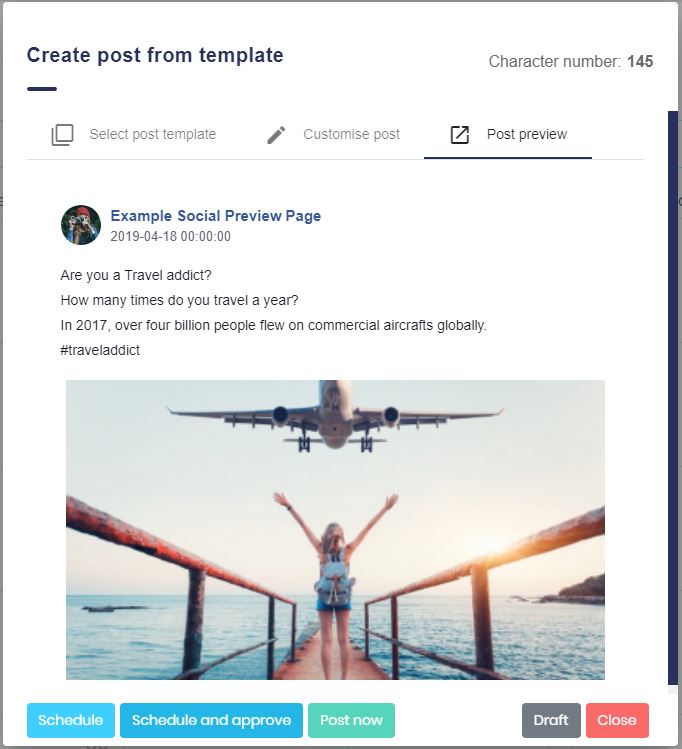
11. Click “Post preview” to see what your content will look like. Select ‘Post now’ or schedule the content to be published.
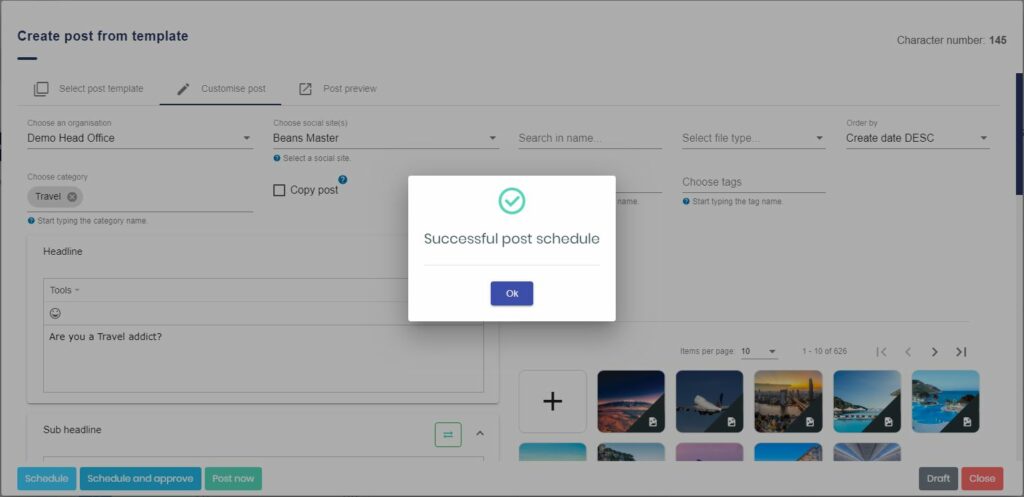
12. If you have chosen to schedule your post, a pop up will appear to notify you that it has been done so successfully.
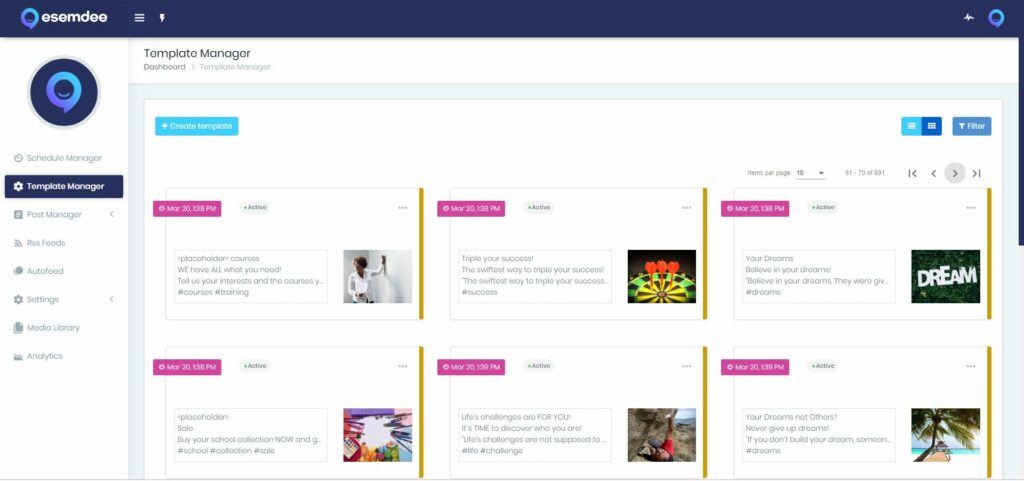
13. You can click “Template manager” in the left menu to see a list of templates available or to create a new template by clicking on the ‘Create template’ button in the top right corner.